Migrate hotspot (Bintec) from previous version of SyCes
The migration of a Bintec router, configured for the previous version of SyCes (https://hotspot.bintec-elmeg.com/, https://hotspot.syces.de/ or https://syces.de/) to the new version of the software is explained step by step below.
Information about setting up a new Bintec router for SyCes and further information about possible settings, can be found at new hotspot - Bintec.
The new version of SyCes runs on a new, highly available cluster with new domains. Therefore, all IP addresses and URLs in the router settings that point to the previous system must be changed.
Prerequisites
To change a configured router, you need administrative access to that router. The following shows the configuration via the GUI web interface of a Bintec router.
Additionally, you need to know your setup's network configuration to gain access to the router through a preconfigured interface. Depending on your setup, you may need to address the router via a separate network port with a different IP address.
For configuration you also need information about the RADIUS IP and secret of the new system. This information can be read out from SyCes.
The IDs in the new database do not match the previous database. Therefore, the tenant and location IDs in the login URL must also be changed. These IDs are part of the Walled Garden URL and are required to migrate to the new version.
Read out login URL and RADIUS info from new SyCes
In order to migrate the router settings to the new version of SyCes, the location that manages this router must exist in the new database. Information about the location and tenant ID needs to be available.
If you want to read out the IDs from the new system or create a new location for your tenant, you need valid access data for SyCes.
Ideally, all tenant data will already have been migrated to the new system, so you can navigate to the corresponding tenant's location page and click the link next to URL on the Location details card. The link should look like this: /login/<tenant_id>/<location_id>/. Clicking the link will open the walled garden/login page for this location in a new tab, its URL should look like this: https://backend.syces.de/login/<tenant_id>/<location_id>/. This is the URL we need to set as the Walled Garden URL in the router settings.
The RADIUS IP and secret can be found here. This page is linked in the bottom left corner of the website (see RADIUS data).
Step 1: Log in to router's GUI
Access the router's web interface by entering the router's IP address in a browser of your choice on a device connected to the router. Depending on your router's configuration, it may be easiest to connect your device on a subnet of the router.
Log into the router's web interface with your access data. Note: The default username is admin.
Step 2: Change RADIUS Server
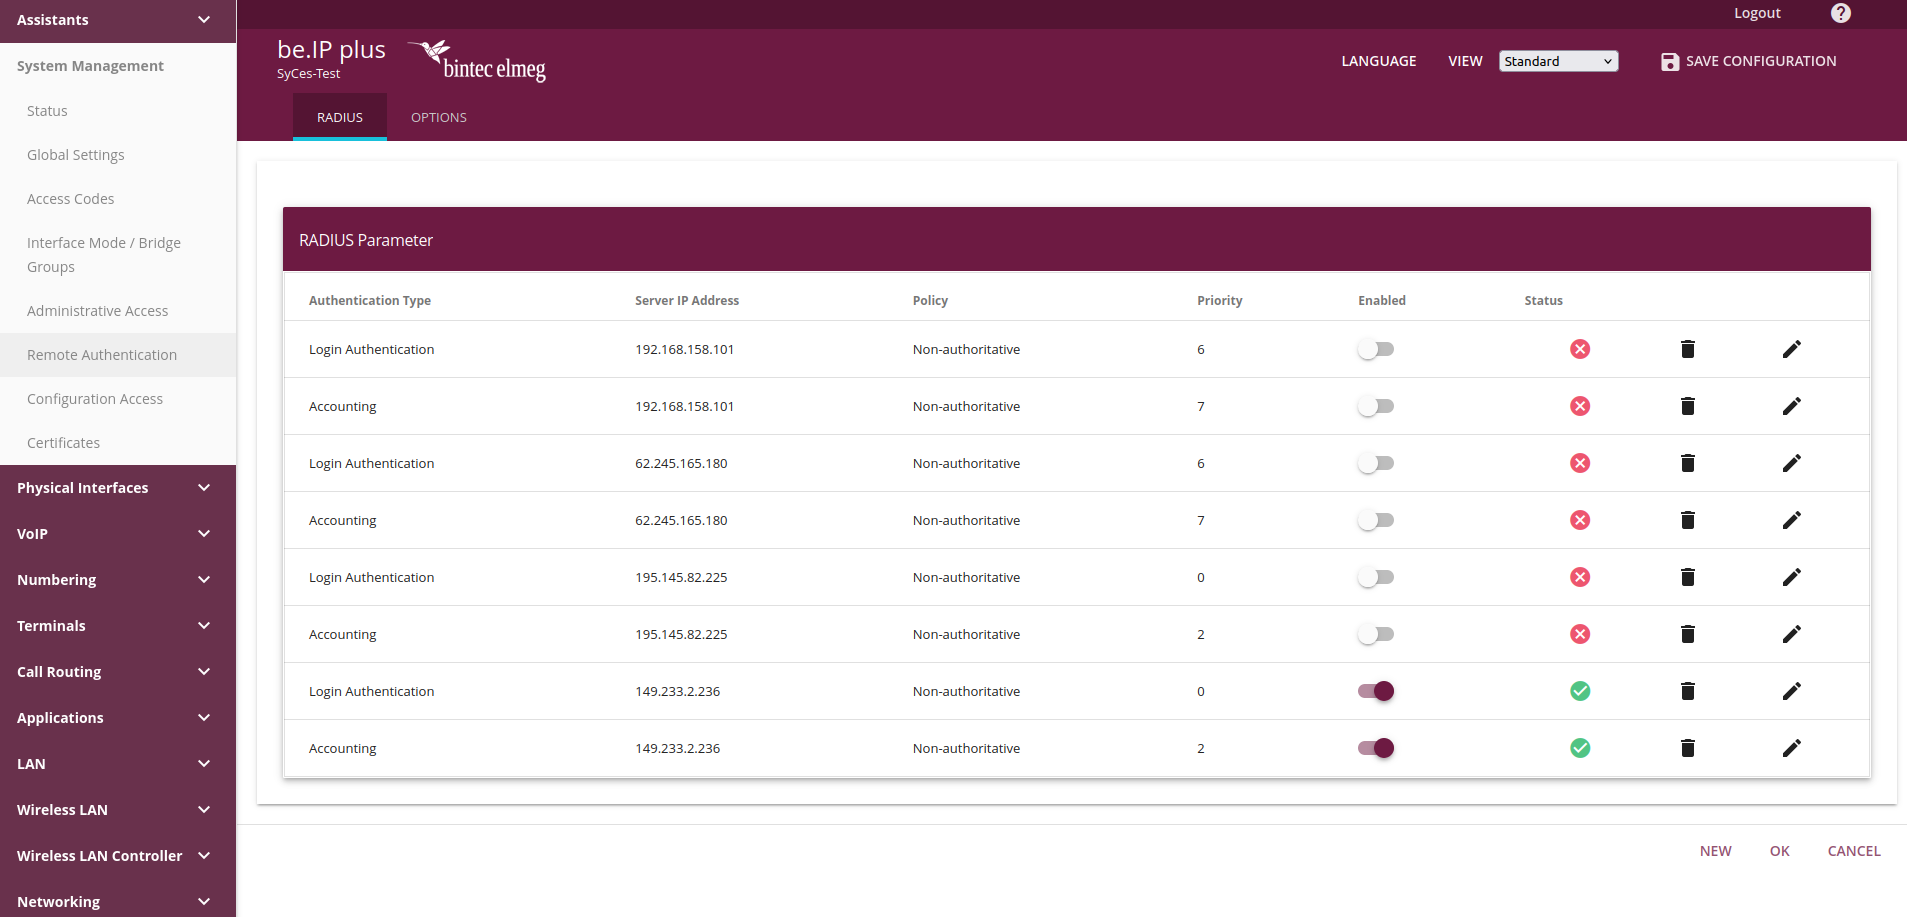
Next, navigate to the System Management / Remote Authentication tab. In this list you should see two active entries Login Authentication and Accounting that point to the RADIUS Server of the previous version of SyCes.
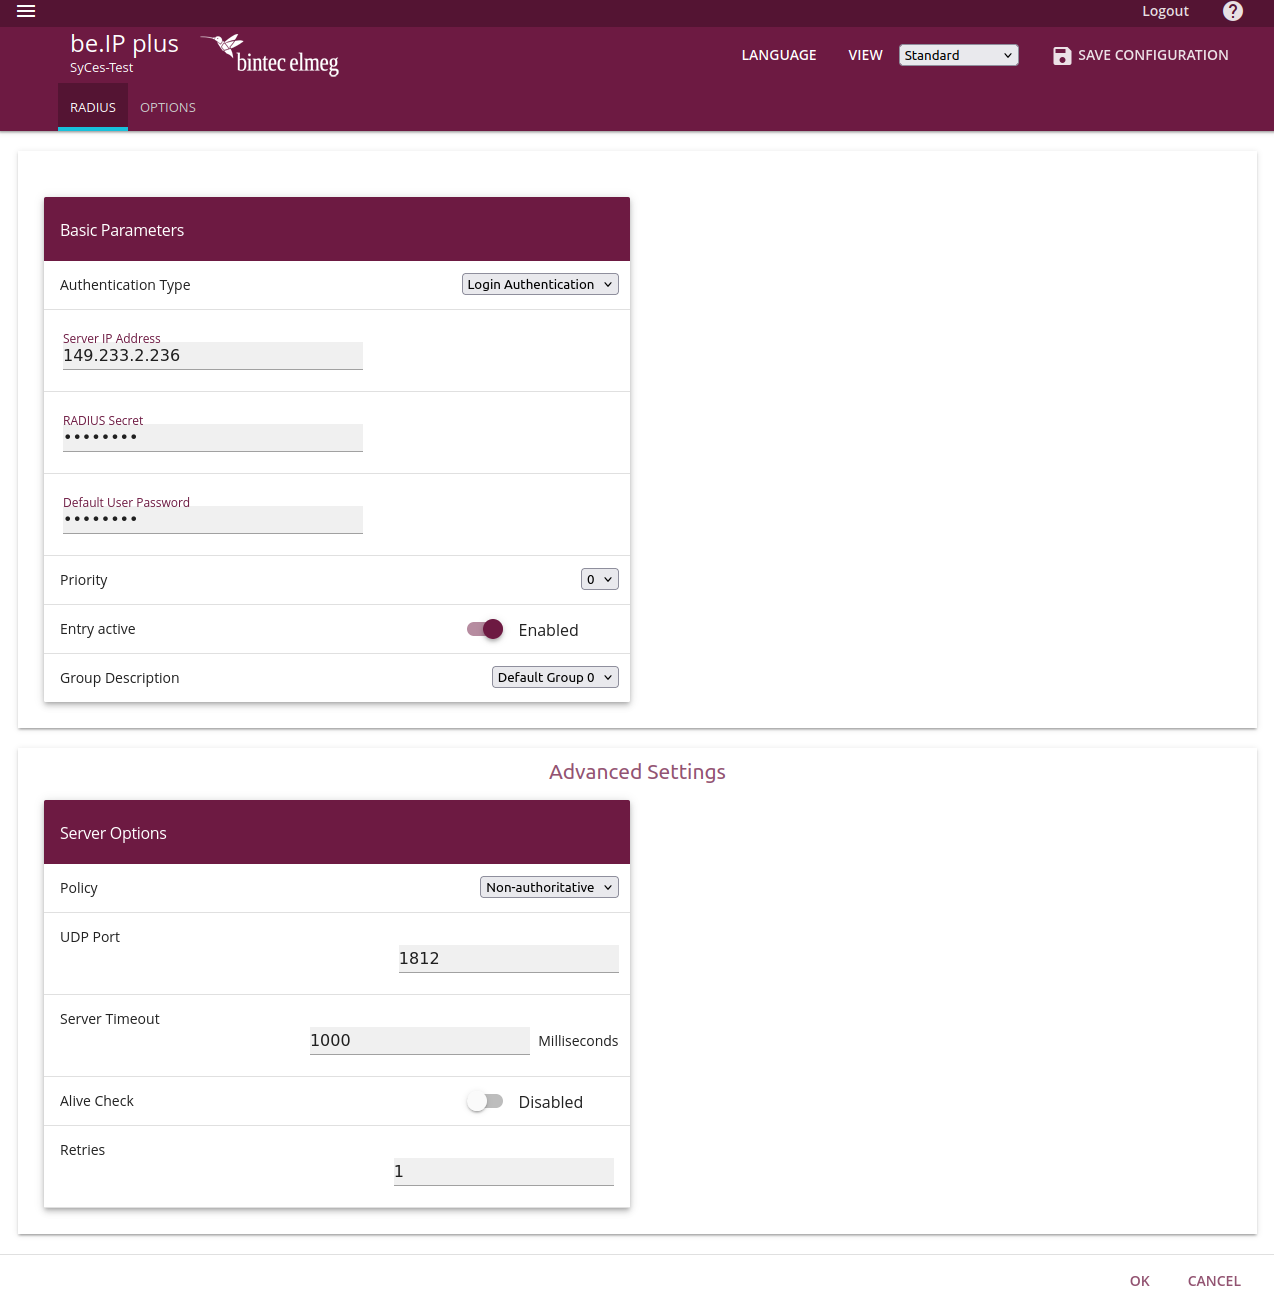
Open each of these two active entries. The new server's RADIUS IP and secret must be entered into the Server IP Address and RADIUS secret fields, respectively. The Default User Password field is optional. You can just paste the secret here if you want to.
Hint: If there are additional configured entries, ensure that all disabled entries are set to a Group Description other than Default Group 0. Only the active entries need to be set to this group.
For further information about the available options, see New hotspot - Bintec.
Step 3: Change Hotspot Gateway
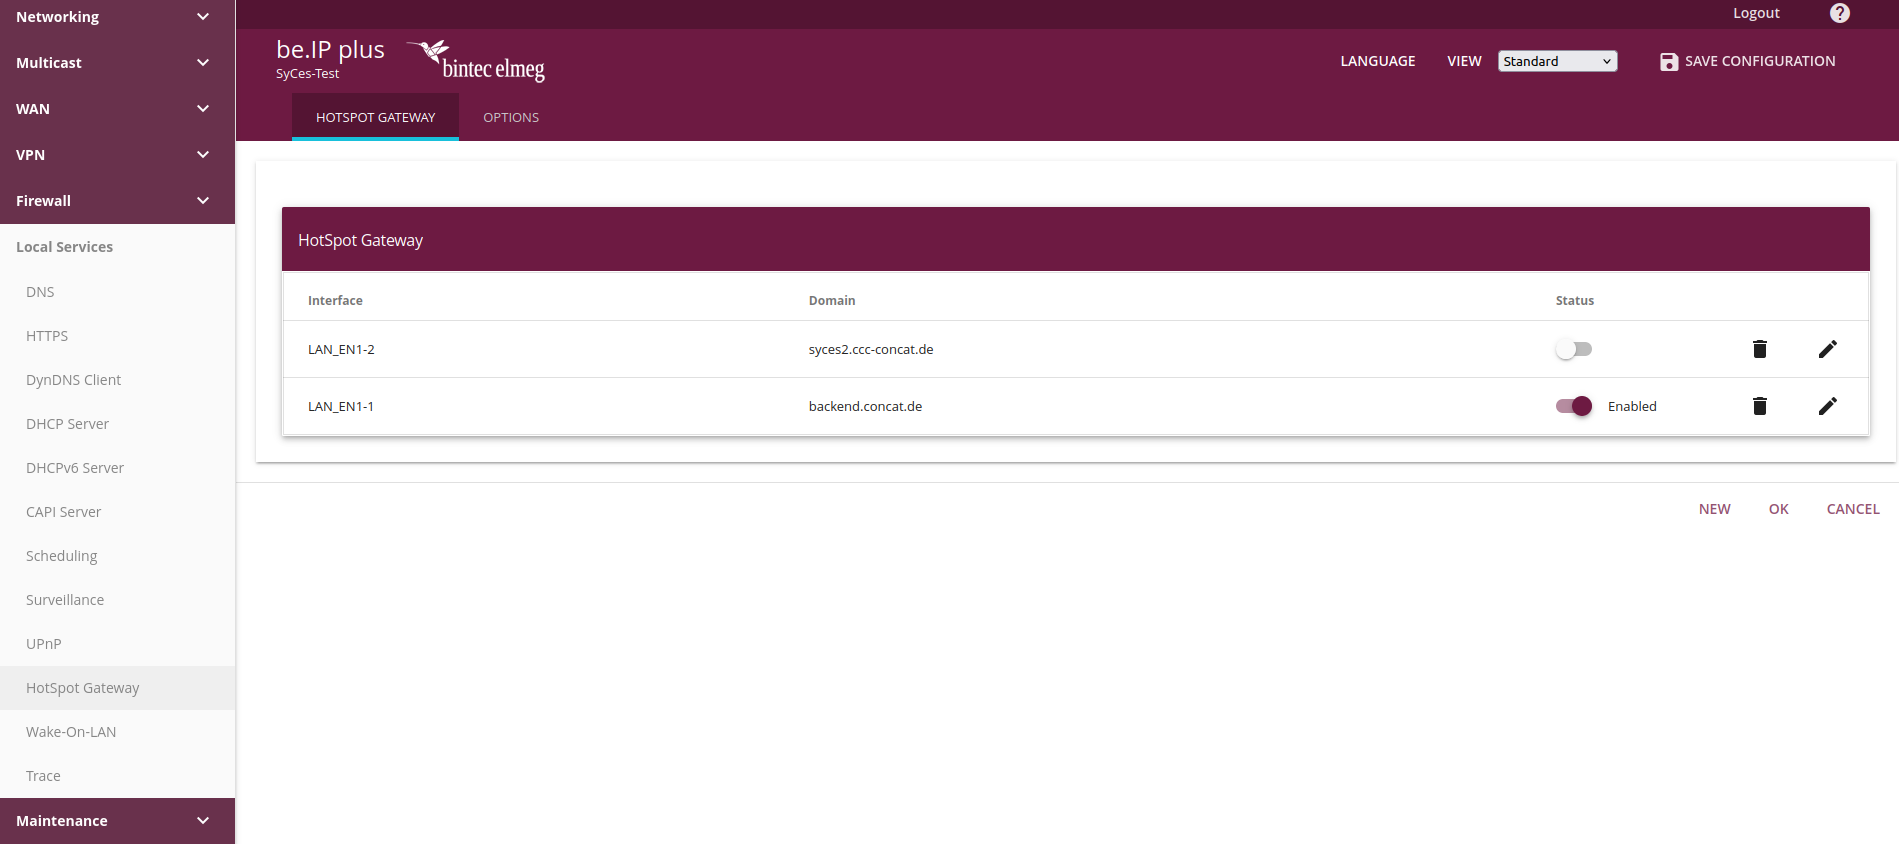
Next, navigate to the Local Services / HotSpot Gateway tab.
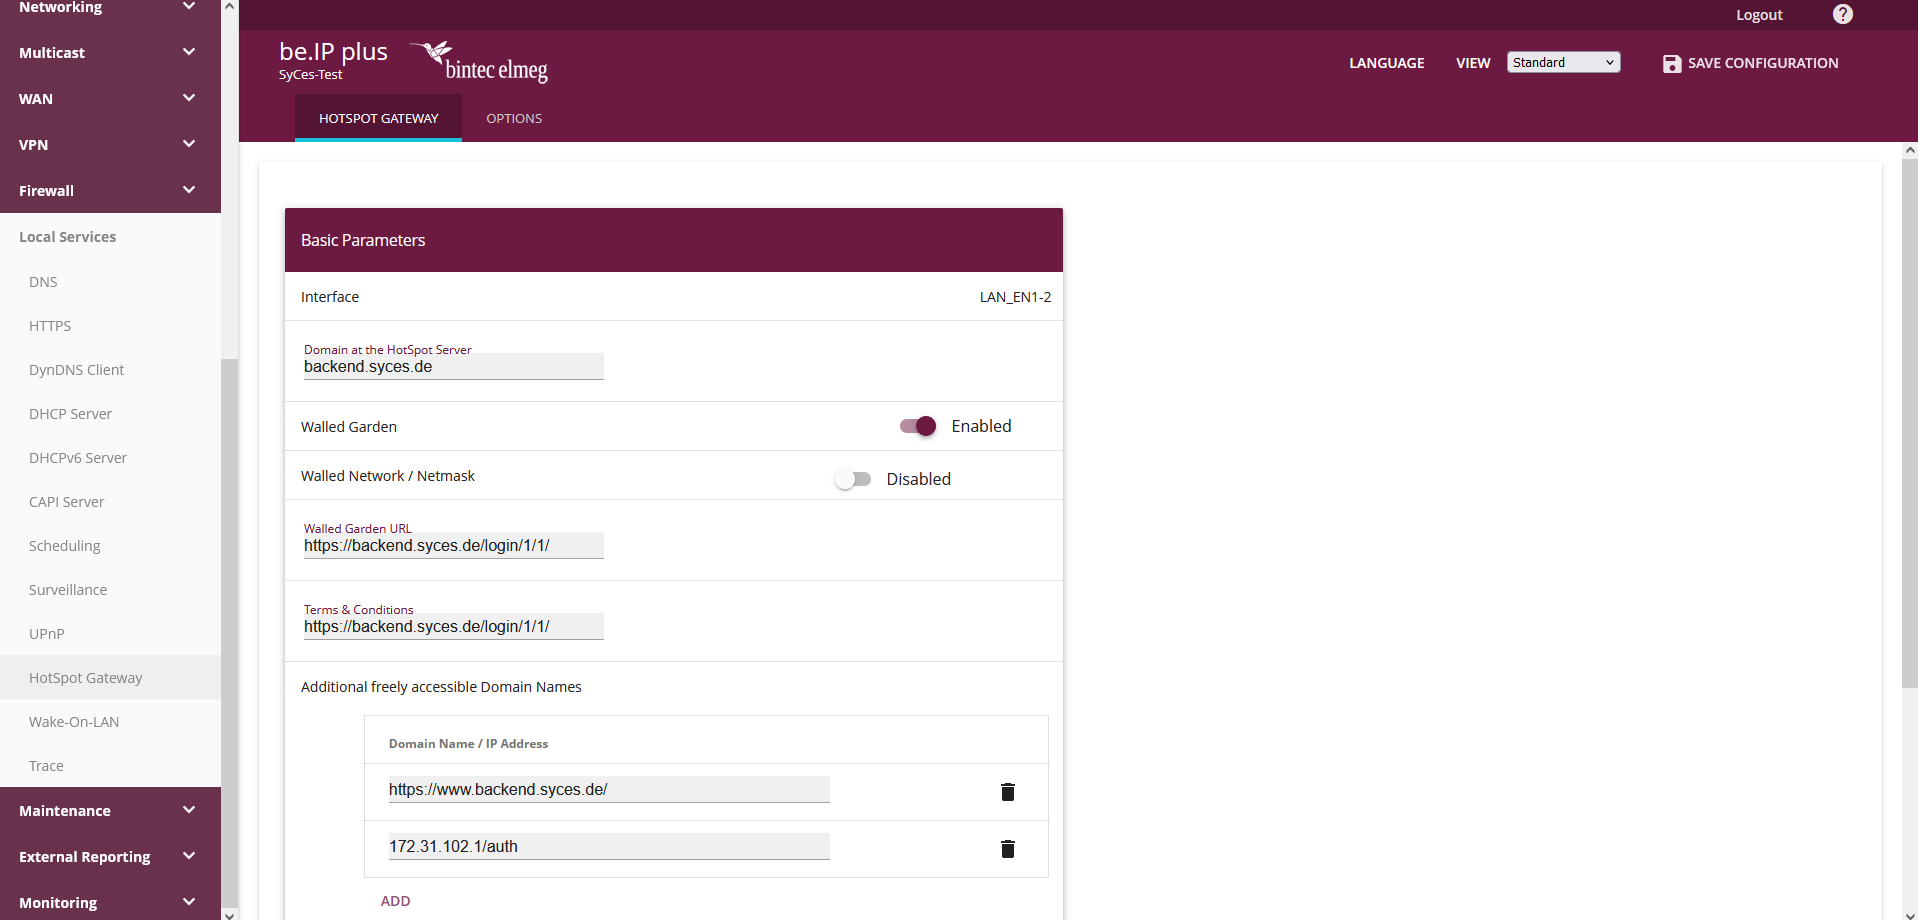
Open the active hotspot gateway entry (see below). On this page we see that the hotspot is configured to call the previous version of SyCes (URLs like hotspot.bintec-elmeg.com or hotspot.syces.de). We are particularly interested in the fields Domain at the HotSpot Server (formless name for router list), Walled Garden and Walled Garden URL (URL that is called by the connecting device).
The Domain at the HotSpot Server can, for example, be set to backend.syces.de to display the migrated settings in the gateway list. Since this is formless field, you can also give this entry a different name.
Before the migration the Walled Garden URL should still be in the form https://hotspot.syces.de/<tenant_id>/<location_id>/ (or other domain). There may be a ?mac=${CLIENT_MAC} appended in the URL. This is used to re-authenticate the device if the auto login feature is active for the location.
The new Walled Garden URL should look like this: https://backend.syces.de/login/<tenant_id>/<location_id>/ with the IDs from the new database. Please check that the URL in your browser displays the self-service portal as expected.
If you would like to continue using the auto login feature, enter the URL as https://backend.syces.de/login/<tenant_id>/<location_id>/mac=${CLIENT_MAC}. This URL uses the device's MAC address for the CLIENT_MAC variable. This allows the server to identify the device and search for open sessions.
The Terms & Conditions page is an optional parameter. For the new location it looks like this: https://backend.syces.de/login/<tenant_id>/tos/loc=<location_id>/. This page can also be accessed via a link from the Walled Garden page.
The following image shows an example configuration after migration:
For more detailed instructions and options for setting up a hotspot gateway for the new SyCes, see new hotspot - Bintec.
Step 4: Login Attempt
After changing these setting on your Bintec router, connecting a device to the Wi-Fi should open the webpage configured for the walled garden.
The login can be tested by entering valid credentials (of existing account or via the self-service portal). After a successful login, the device should display a page with a success message and the device should be logged into the Wi-Fi.
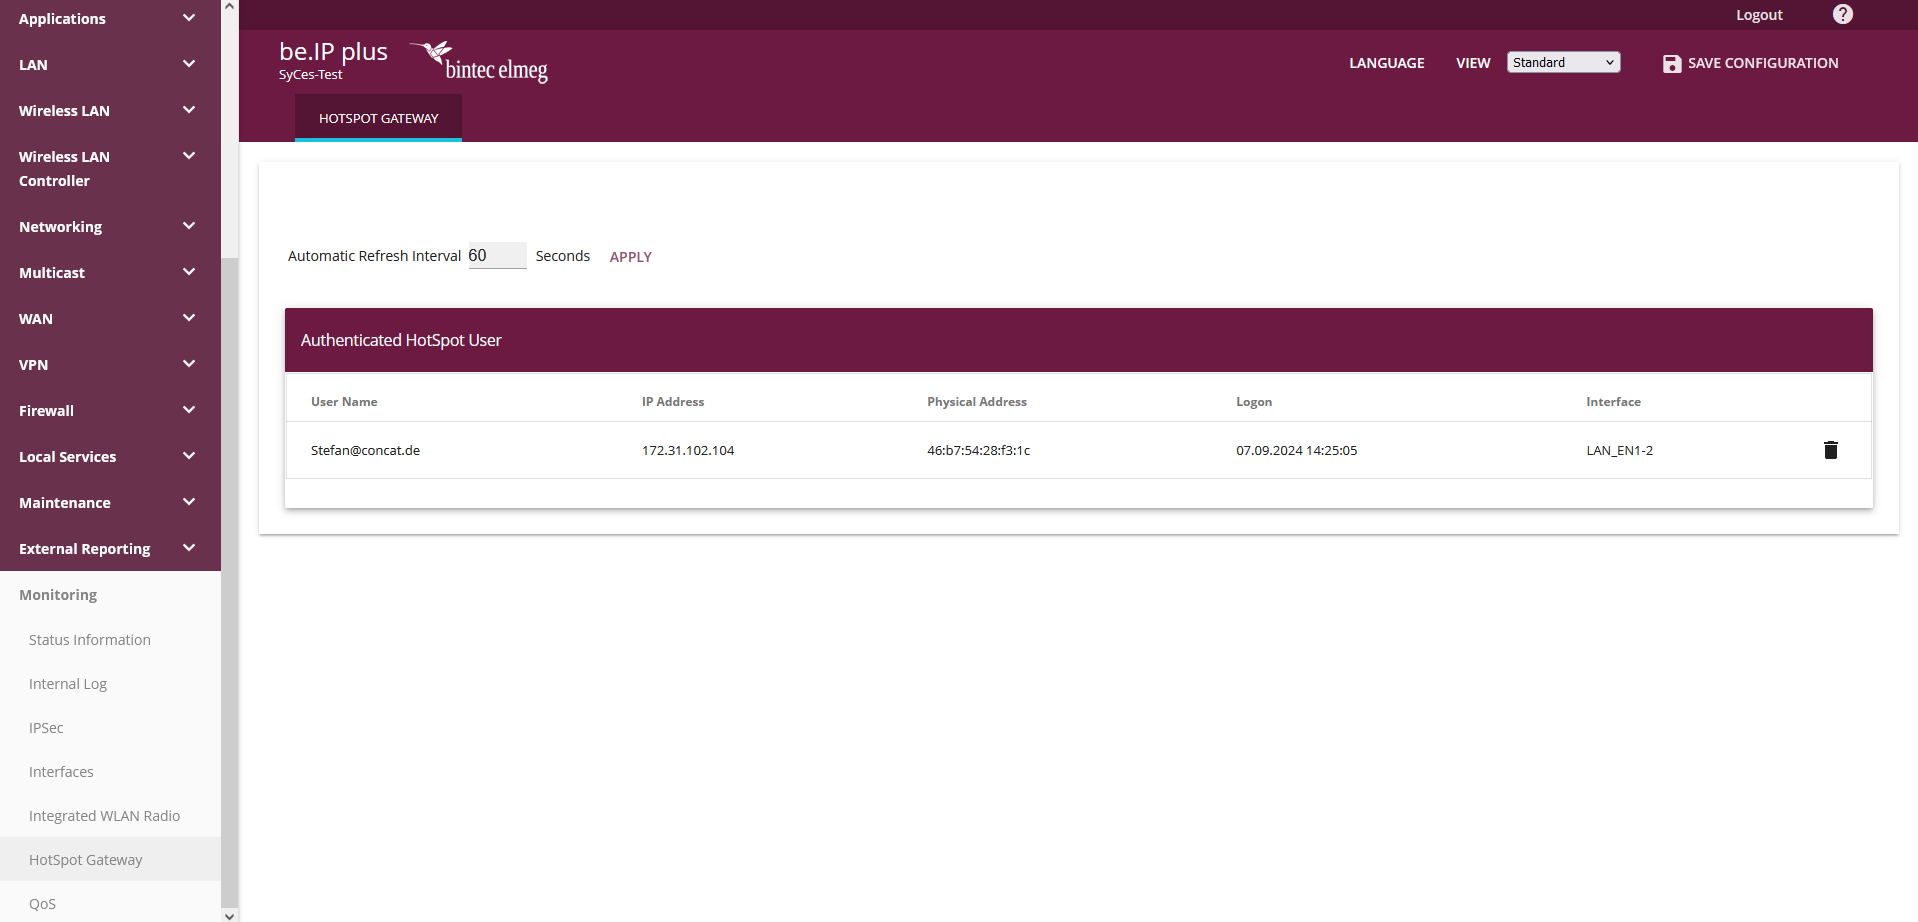
A list of all logged in devices is displayed in the Monitoring / HotSpot Gateway tab of the router settings.
Troubleshooting
If you experience any problems or unexpected behavior when migrating your router, please contact us via [email protected].
